Steps to Create a Gift Card/Gift Certificate
Follow these steps to create a Gift Card/Gift Certificate for your Center-

Before we dive deep into the process, understand the following-
1. Code Ninjas doesn't provide physical gift cards.
2. Gift cards aren't a category of product that we've added yet. Any gift card or gift certificate will be added as a Retail item.
3. These gift cards will be center-specific.
4. You will need to handle and manage Gift cards and Certificates manually.
1. Login to https://cn.mystudio.io/v43/WebPortal/#/login with your MyStudio Center login credentials.
2. Select the Center from the dropdown.
3. From the Homepage, browse to "Services and products">>"Retail"
4. Click on "Live" and then click on "Add Product" on the Products page.
5. If you want to add multiple Gift cards, you'll have to first create a new Product Category, click on "Add Product Category". If your aim is only to add Gift Crad as a Product, then click on "Add Product".
6. To Add a Gift Card under a Product Category, follow the given steps-
7. Select "Custom"
8. Add "Category Title", "Category Subtitle" and "Category Image".
9. Once the details are added, Click "Publish".
10. Once Published, you can Edit/Delete/Unpublish the Product Category.
Save Button- Saves edits/updates
Delete Button- Deletes category
Unpublish Button- Unpublish the category
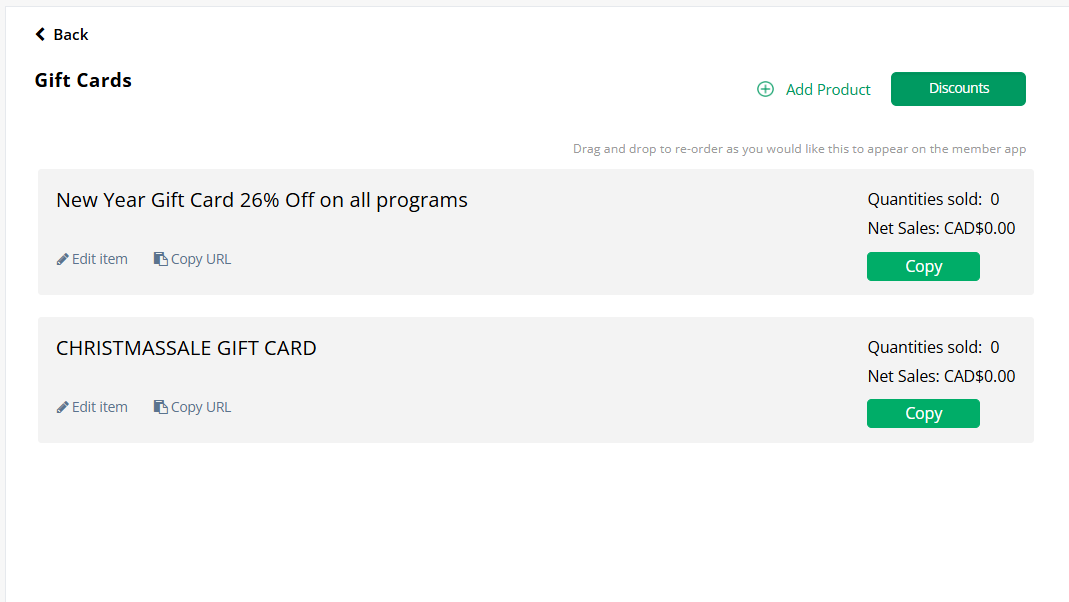
11. Click on Gift Card, "Edit Items" button, to add/edit new Products to the category.
12. Click on "Add Product" to add Gift Cards under the category.
13. Se;ect "Custom" to create a Gift Card from scratch.
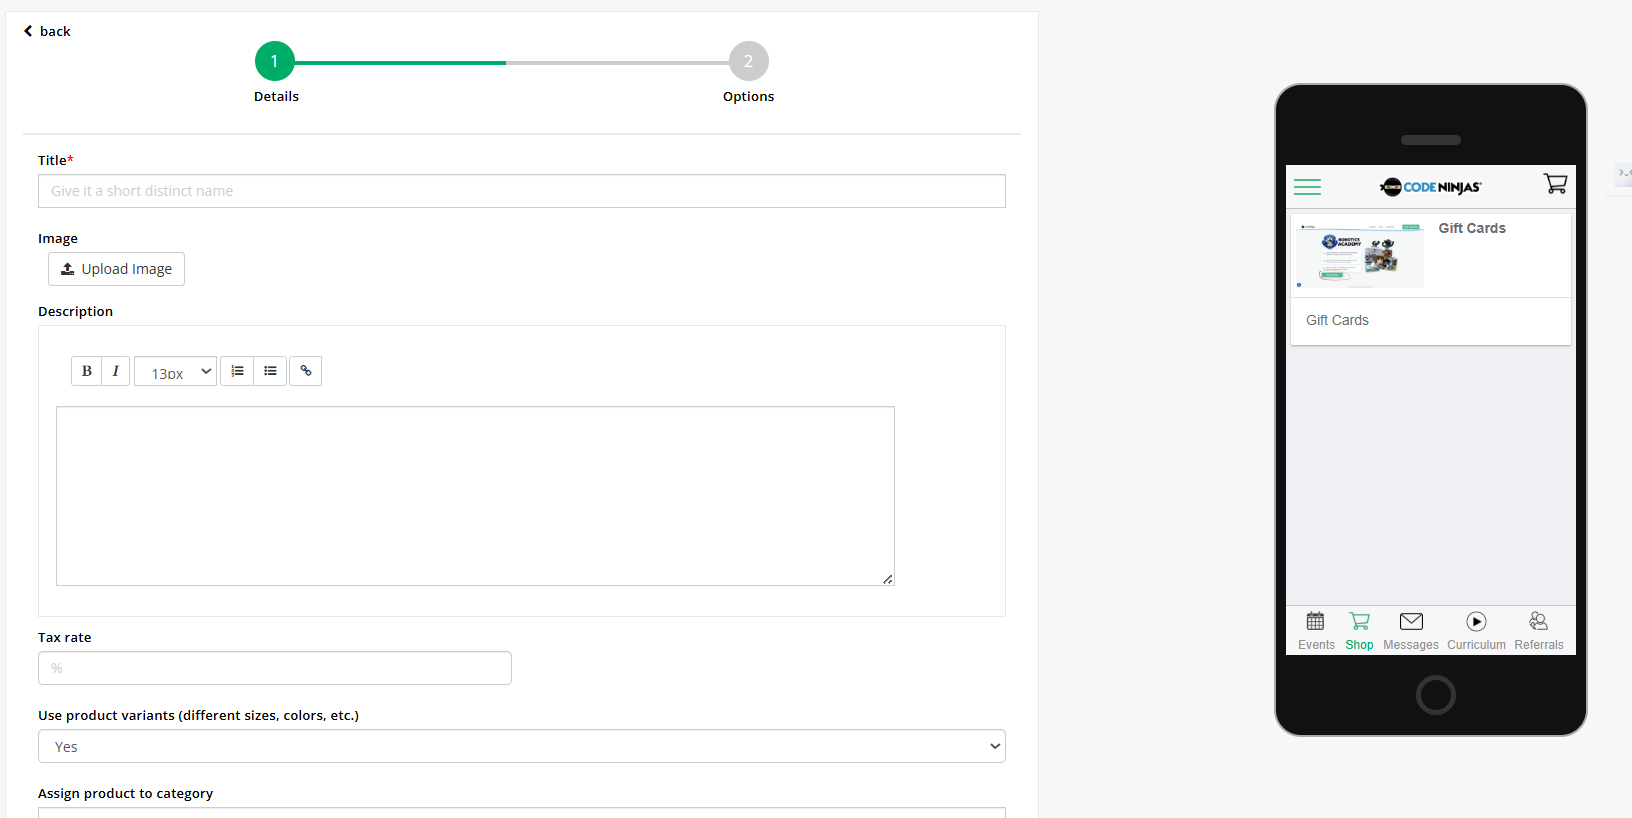
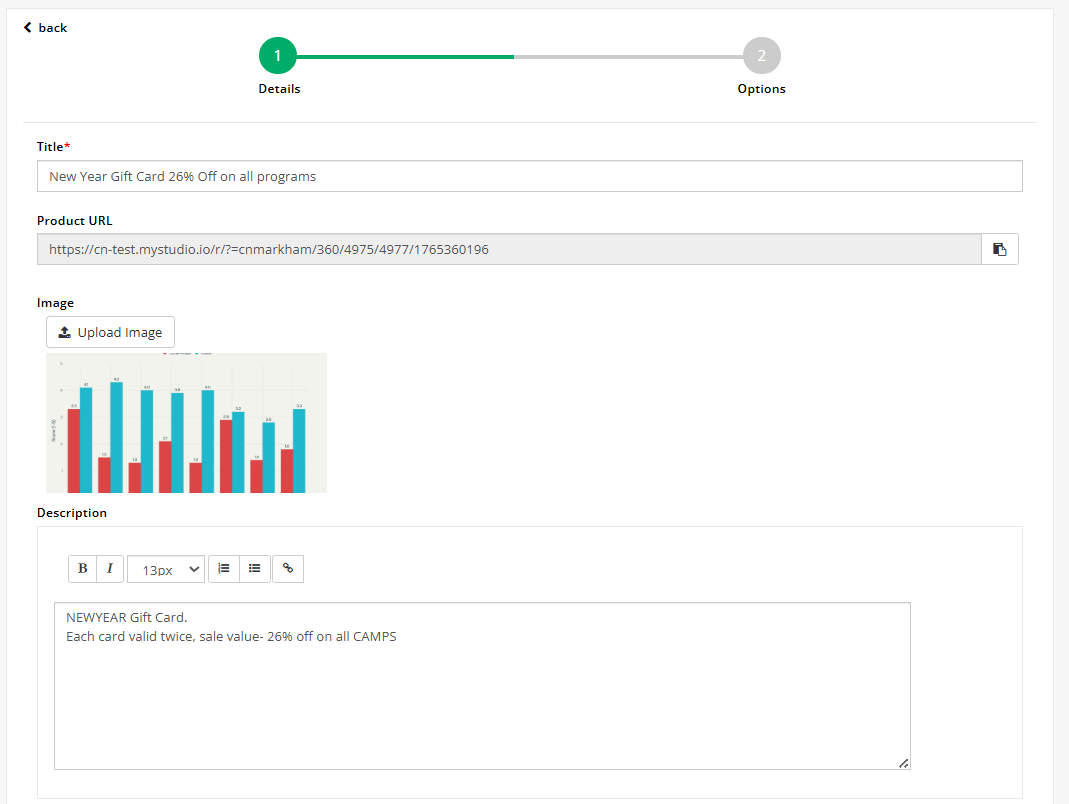
14. On the Product detail screen, add all the required details-
- Add Gift Card Title in Title
- Upload Gift card image in Image Upload section
- Add Gift Card Description, and how to avail and other TnCs under Description.
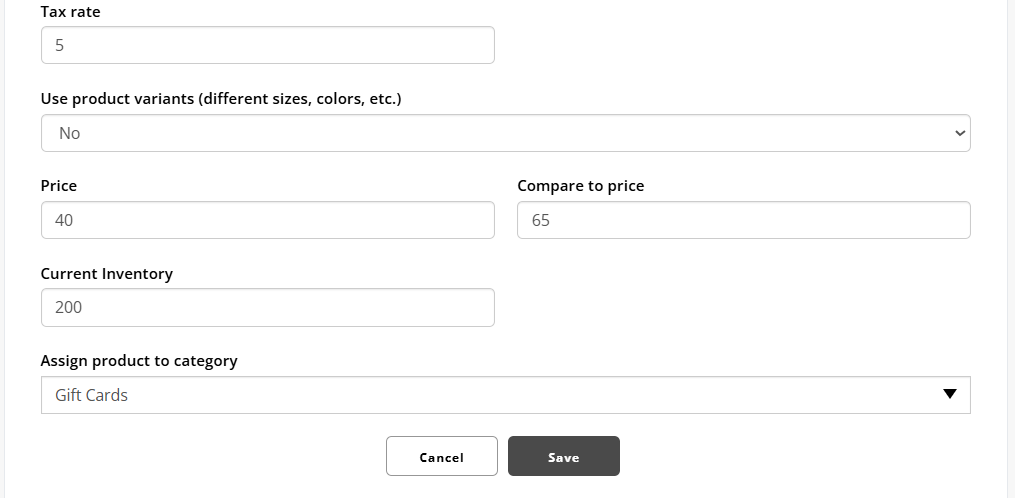
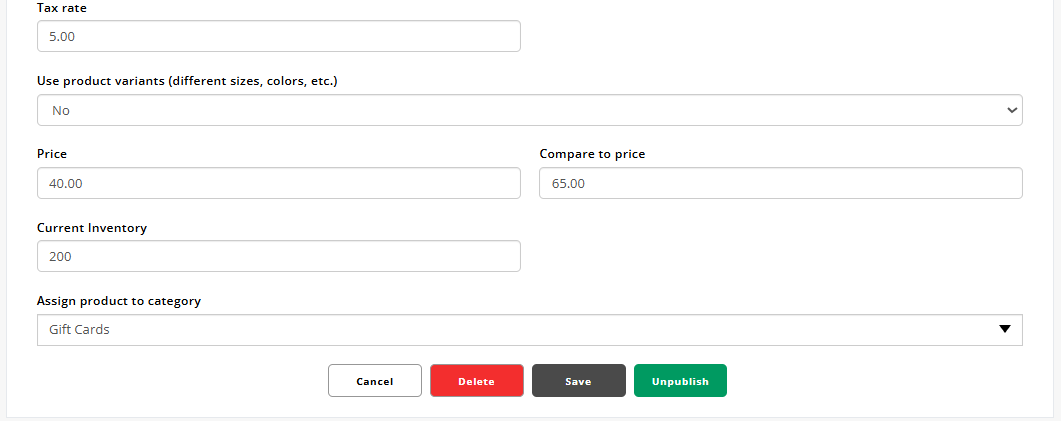
- Add respective Tax Rates for your region.
- Since the Gift Card doesn't have a variant, select "No" from the dropdown, the additional fields will pop up.
- Add Price and Compare to Price.
- Add quantity available in Current Inventory.
- Add respective Tax Rates for your region.
- Since the Gift Card doesn't have a variant, select "No" from the dropdown, the additional fields will pop up.
- Add Price and Compare to Price.
- Add quantity available in Current Inventory.
- Select the Product Category under which the Gift Card will be displayed.
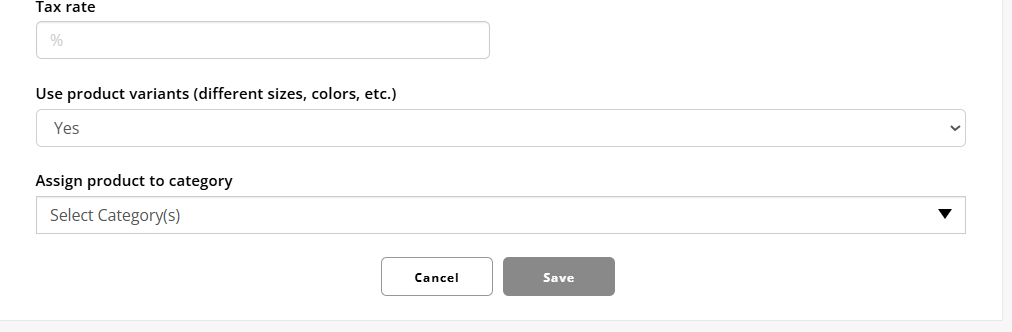
15. Verify all the details and then Save the product.
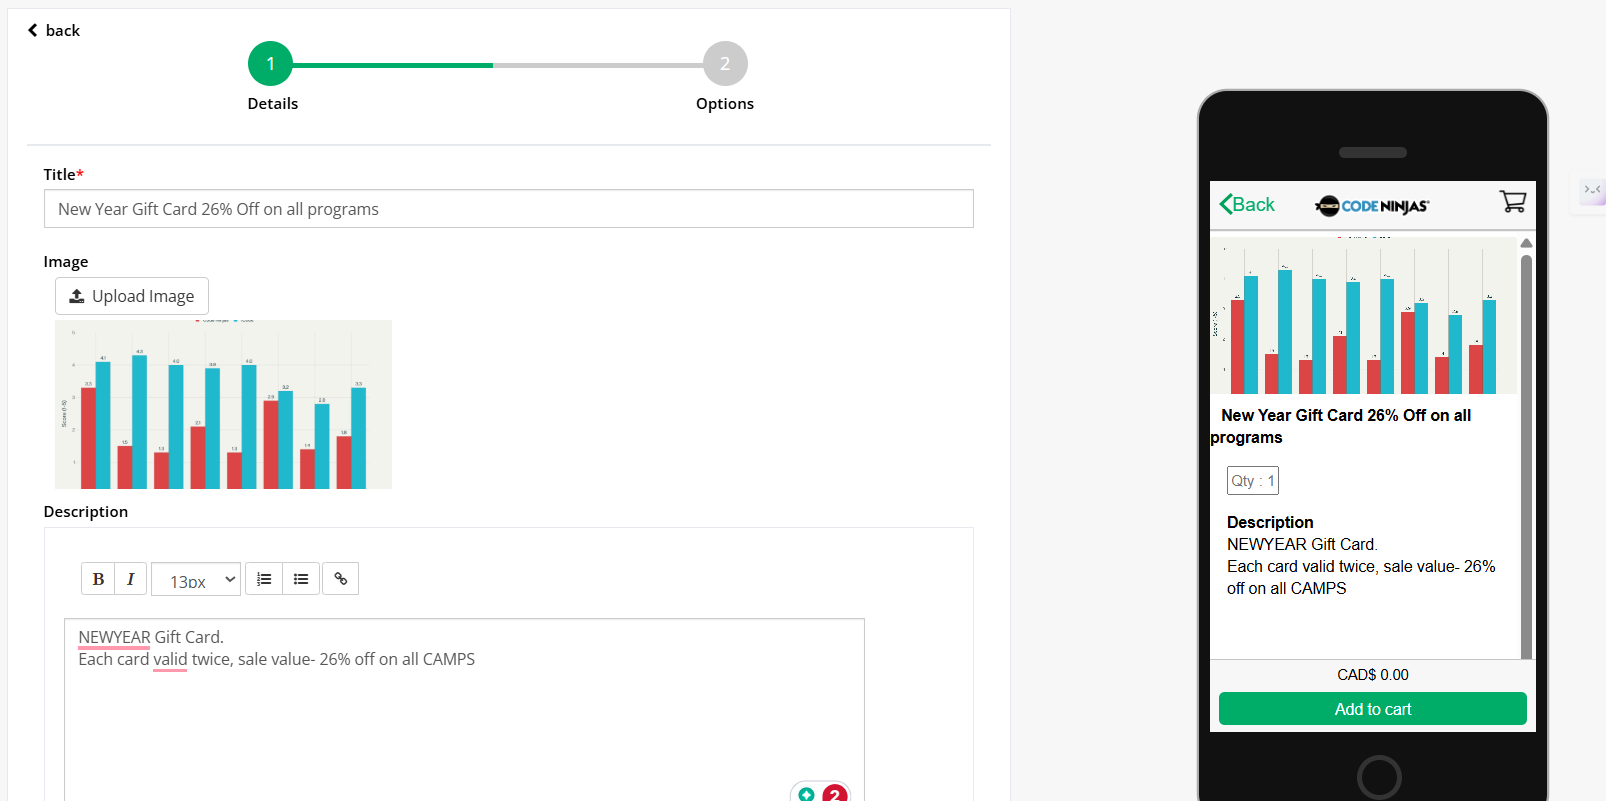
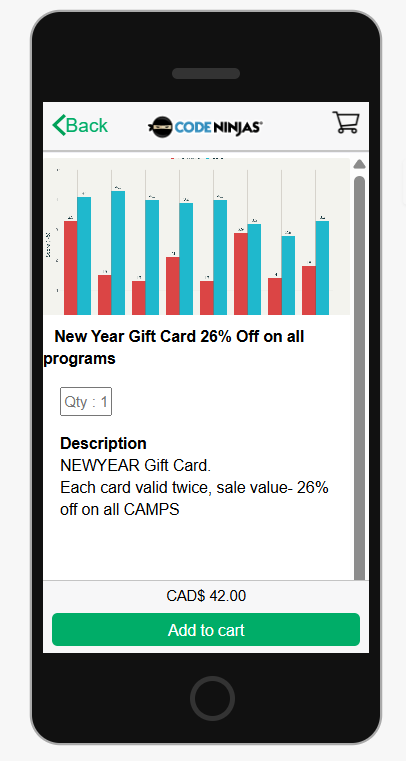
16. You can also check the Gift Card details that will be visible on the website and Update before saving as required.
17. Once saved, all Products under the category will be published Live on the app.
18. You can Update the Gift Card details, upon clicking "Edit Item"
19. Once Published, you can Edit/Delete/Unpublish the Product.
15. Verify all the details and then Save the product.
16. You can also check the Gift Card details that will be visible on the website and Update before saving as required.
17. Once saved, all Products under the category will be published Live on the app.
18. You can Update the Gift Card details, upon clicking "Edit Item"
19. Once Published, you can Edit/Delete/Unpublish the Product.
Save Button- Saves edits/updates
Delete Button- Deletes product
Unpublish Button- Unpublishes the Gift Card
20. Click on Copy Link to copy and share the Product link with the customer.

Related Articles
Managing CAMPS on MyStudio and Franchise Dashboard
Purpose This SOP outlines the current process for creating, editing, publishing, unpublishing, and deleting CAMPS (Events) using MyStudio and the Franchise Dashboard, based on existing system behaviour. Due to partial synchronisation between systems, ...Steps to Access "Ninjas in Dojo" screen
1. Use your Center Portal credentials to login to Center Portal. You'll be taken to Center Portal Homepage as given- 2. Click on "Ninjas in Dojo" button on the Right-hand side of the screen. 3. You'll be redirected to a new tab which displays the ...Center Portal: Steps to Extend Session Time
1. Browse and click on the “Ninjas in Dojo” button on the Homepage of the Center Portal. 2. Select the Ninja’s tab whom you want to extend the session for. Note: To be able to reduce their session time, Center Staff needs to make sure that Ninja’s ...Center Portal: Steps to Extend a Ninja's Session
Mentioned below is a step by step guide to extend a Ninja's Session on the Center Portal. 1. Login to the Center Portal using your Code Ninjas credentials. And browse and click on the "Ninjas in Dojo" tab 2. When you're on the "Ninjas in Dojo" ...Center Portal: Steps to enable Manual Check-in
Mentioned below is a step by step guide to enable Ninja's Manual Check-in on the Center Portal. 1. Login to the Center Portal using your Code Ninjas credentials. And browse and click on the "Ninjas in Dojo" tab 2. When you're on the "Ninjas in Dojo" ...